介绍
Snap是一个轻量级布局框架,使用优雅的语法封装AutoLayout。Snap拥有自己的布局DSL,它提供一种链式操作描述你的NSLayoutConstraints,使你的布局代码变得简明易读。Snap同时支持IOS和OS X。
Snap使用Swift的特性,例如函数重载,所以它不能在Objective-C中使用。正因如此,我们使用snp_做为前缀,而Masonry使用mas_,所心在你可以在同一项目中同时使用Masonry和Snap。
基于Objective-C,移步Masonry
下载安装
下载
在项目的根目录,使用git submobule命令
$ git submodule add https://github.com/Masonry/Snap.git
安装到项目中
Finder中打开Snap,用鼠标拖到项目中
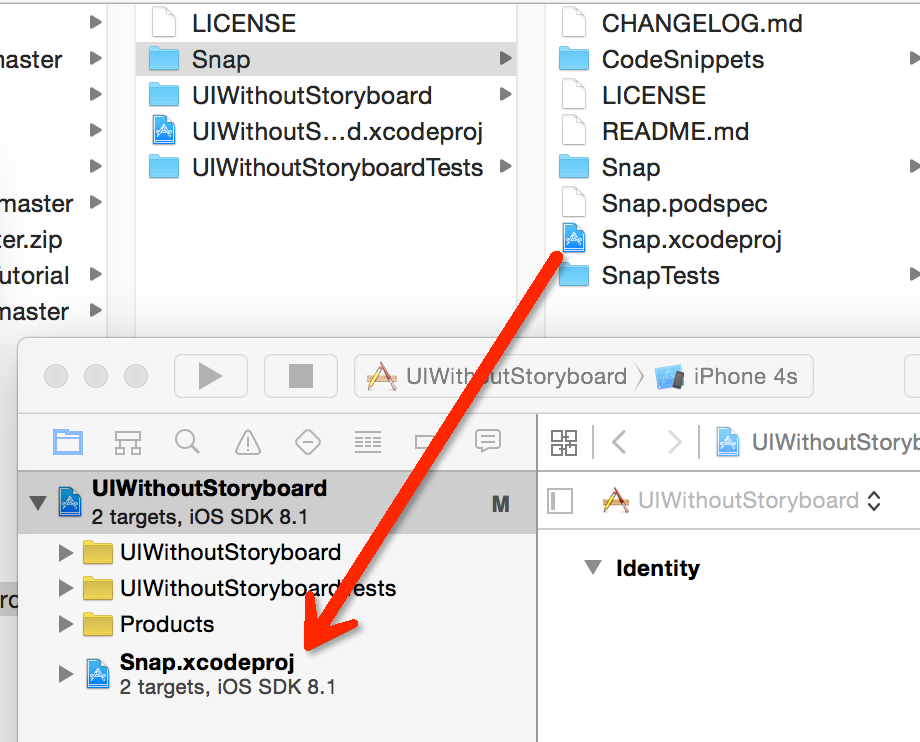
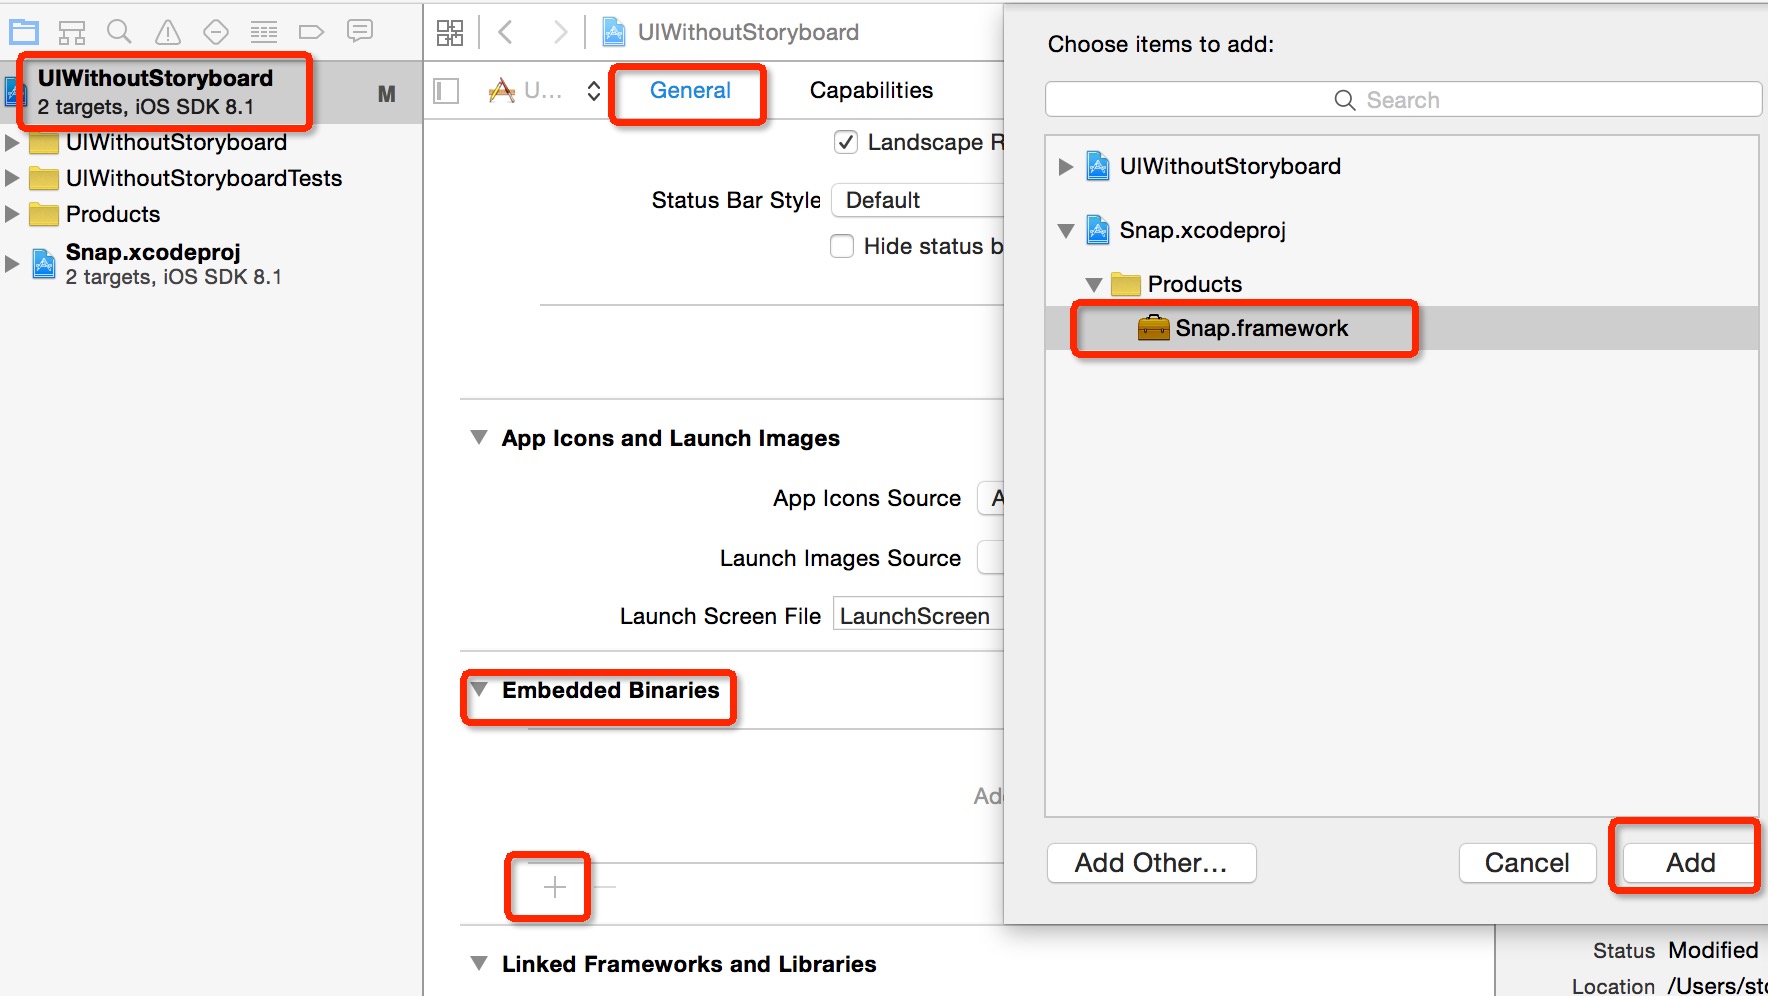
将Snappy.framework添加到项目中
简单示例(添加一个居中的按钮)
不使用自适应布局
上篇RootViewController.swift示例代码为:
override func viewDidLoad() {
    super.viewDidLoad()
    button = UIButton.buttonWithType(.System) as? UIButton
    button.frame = CGRect(x: 110, y: 70, width: 100, height: 44)
    button.setTitle("Press Me", forState: .Normal)
    button.setTitle("I'm Pressed", forState: .Highlighted)
    button.addTarget(self, action: "buttonIsPressed:", forControlEvents: .TouchDown)
    button.addTarget(self, action: "buttonIsTapped:", forControlEvents: .TouchUpInside)

    self.view.addSubview(button)
}
按钮都的位置都是写死的,无法在各种屏下(横屏)自适应。
添加约束条件
override func viewDidLoad() {
    super.viewDidLoad()

    button = UIButton.buttonWithType(.System) as? UIButton
    self.view.addSubview(button)

    button.backgroundColor = UIColor.greenColor()
    button.setTitle("Press Me", forState: .Normal)
    button.setTitle("I'm Pressed", forState: .Highlighted)
    button.addTarget(self, action: "buttonIsPressed:", forControlEvents: .TouchDown)
    button.addTarget(self, action: "buttonIsTapped:", forControlEvents: .TouchUpInside)
//        button.frame = CGRect(x: 110, y: 70, width: 100, height: 44)

    button.snp_makeConstraints { make in
        make.center.equalTo(self.view).offset(CGPointMake(-5, 10))
        return // this return is a fix for implicit returns in Swift and is only required for single line constraints
    }

}
运行,不管在哪种屏下查看效果,呈现在面前的都是一个水平、垂直居中的按钮。 源代码
Comments
comments powered by Disqus